3 Ways To Finish An Embroidery Hoop
December 6, 2021
After days or weeks of stitching, you have finally made the last stitch on your embroidery project. So exciting! Now it’s time to get your hoop ready to display. This blog will walk you step by step through how to finish an embroidery hoop. I’ve gathered my three favorite ways to finish a hoop, stitching the back together, finishing with a paper note, and using a second piece of fabric.
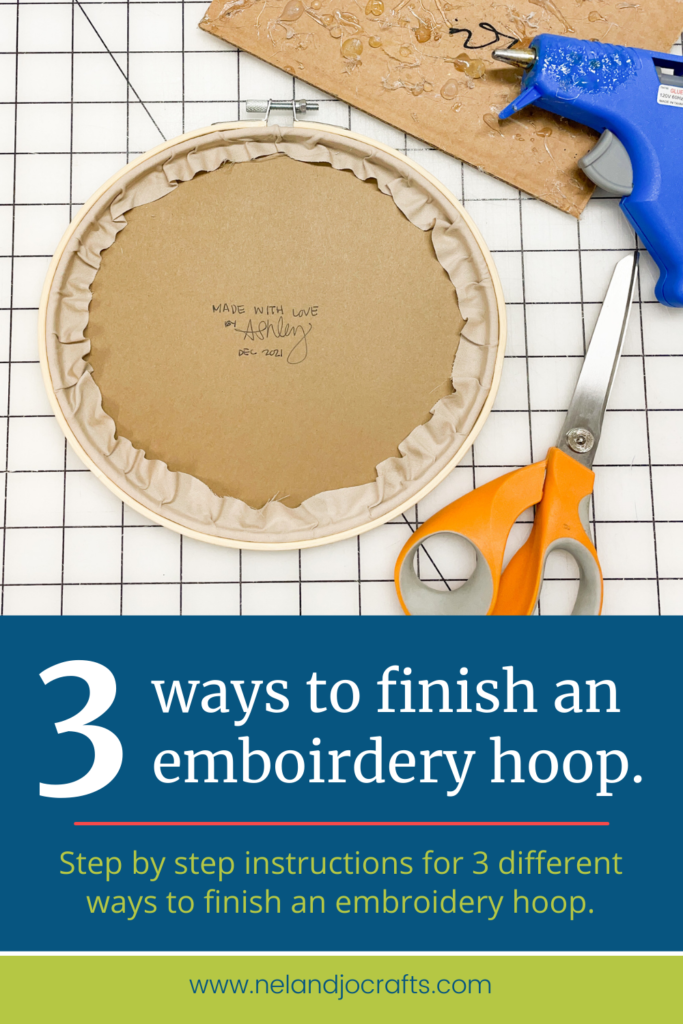
1 – How to finish an embroidery hoop by stitching the back together.
This is the simplest way to finish a hoop, especially if you have just finished stitching, as you will have all the supplies out. I finish 80% of my hoops this way. It is effective and quick.
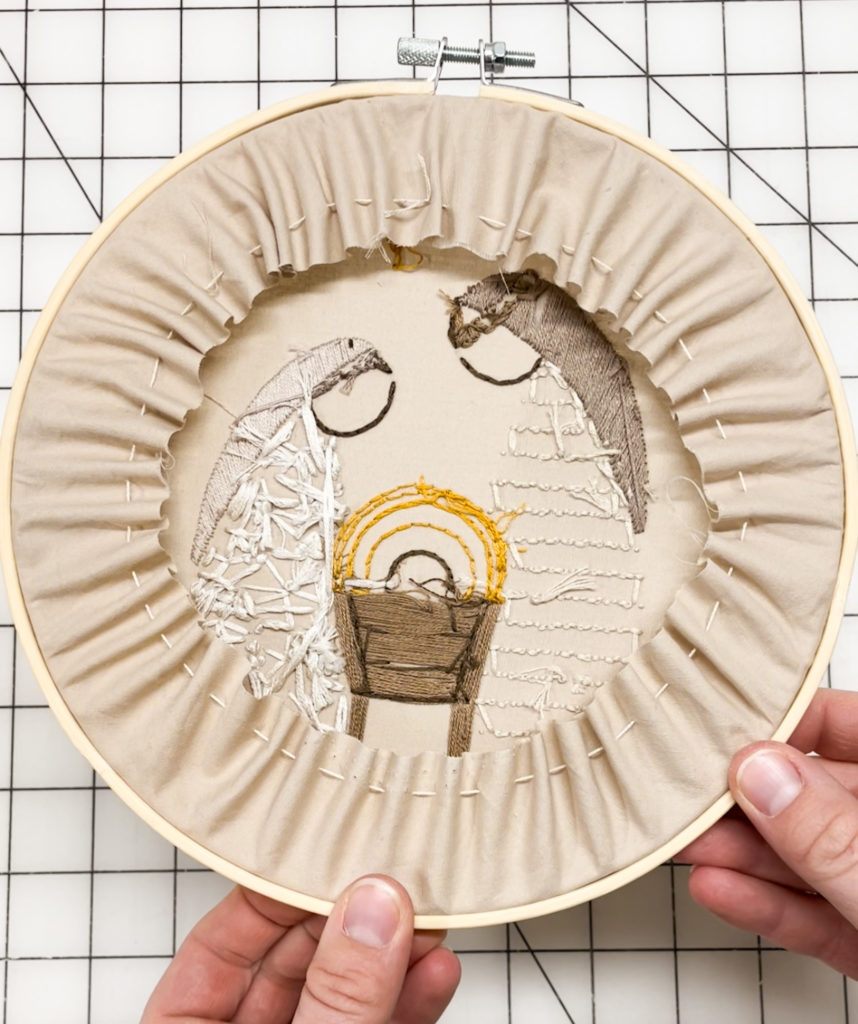
PROS:
- You can adjust your hoop over time.
- No extra supplies needed.
- Quick
CONS:
- You can still see stitching on the back of the hoop (if that bothers you.)
- Your hoop will float off the wall just a bit when you hang it.
Step by Step instructions for stitching back together:
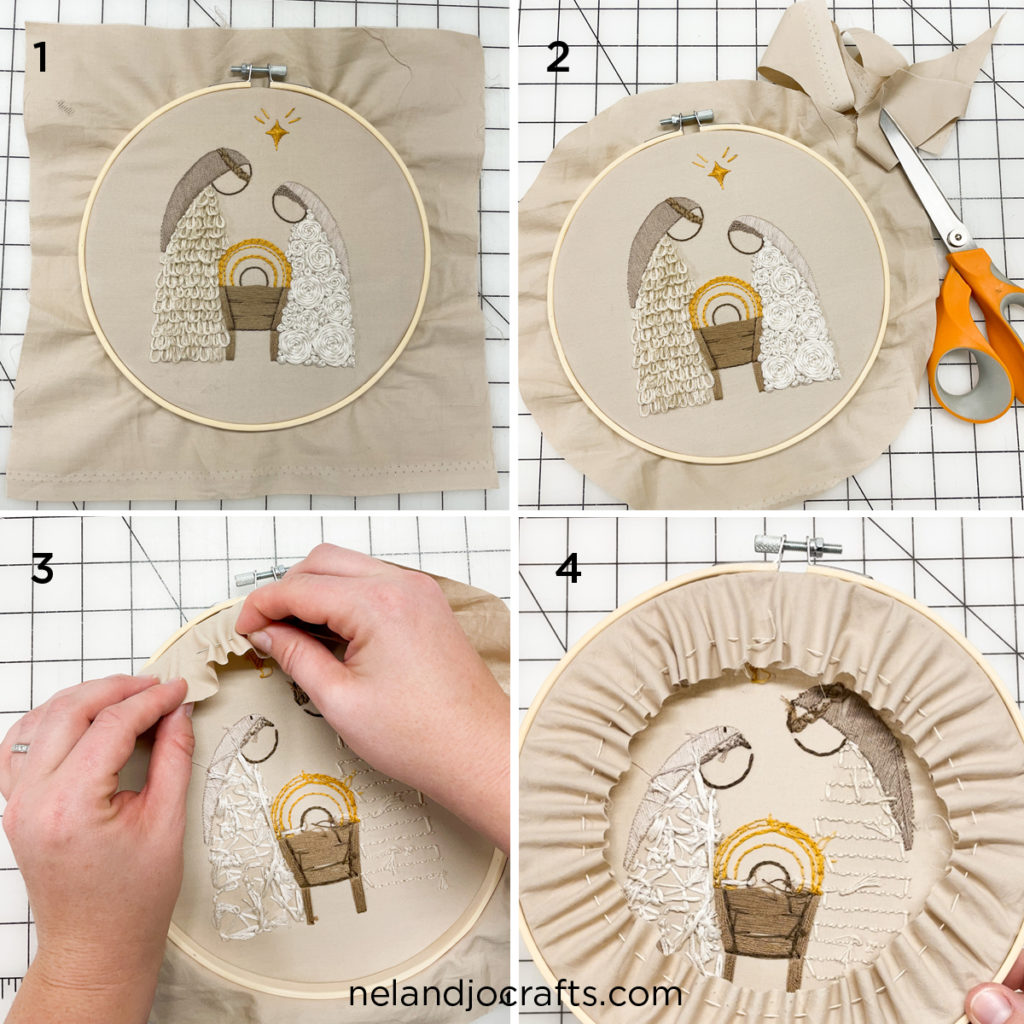
- STEP 1 – Center your embroidery in the hoop on the display side. This is your last chance to adjust, make sure it is aligned how you want and hangs how you want.
- STEP 2 – Trim your fabric to 1.25-1.5″ away from the hoop.
- STEP 3 – Using along section of thread, make a running stitch all the way around the edge of the fabric.
- STEP 4 – Pull the floss tight and tie the two end of the thread together.
- TIP – Test the length of your thread by laying it down in a circle around your hoop. If it goes all the way around it will be long enough.
2 – How to finish an embroidery hoop with a paper back and note.
Adding a special note or simply your signature and date, is a great way to personalize your hoop and make into a keepsake. As an added bonus, the paper will cover up messiness on the back of your hoop and can add an extra surprise of color or pattern.
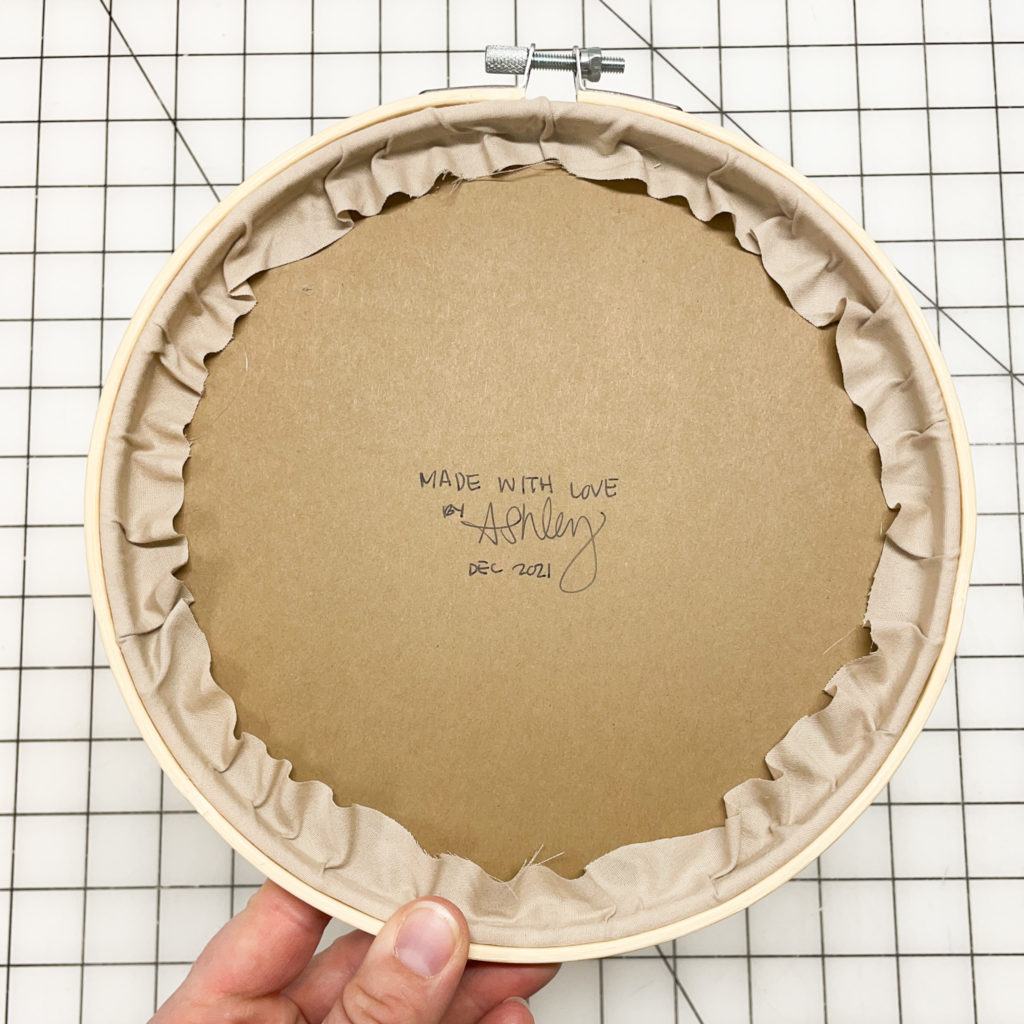
PROS:
- Simple to do
- You can add a note, date and/or signature
- Covers the stitching on the back of the hoop (if that bothers you.)
CONS:
- You can’t adjust the embroidery once you are done.
- You need extra supplies.
Step by step instructions for finishing with paper and a note.
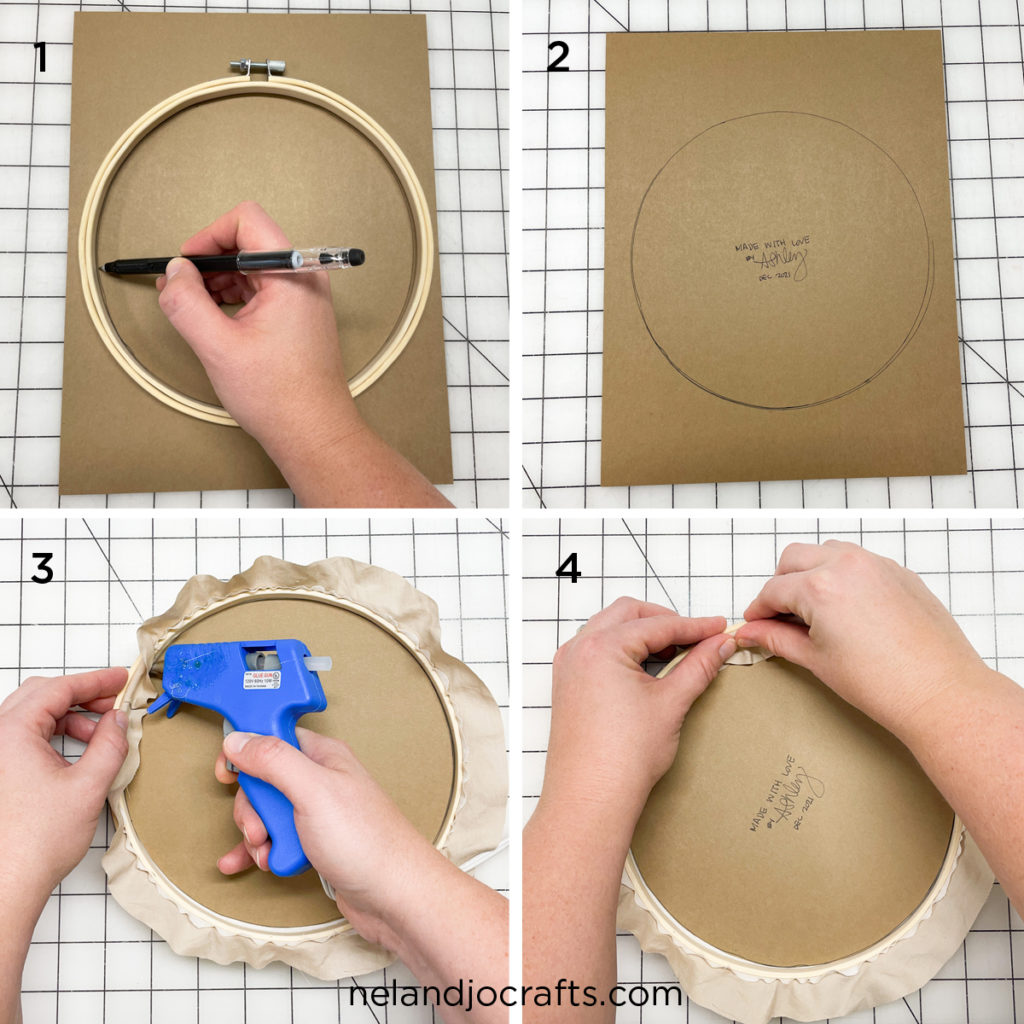
- Before you start, you need to have your embroidery centered in the hoop on the display side and have your fabric trimmed to 1″ from the hoop. (Like steps 1 and 2 for “Step by step instructions for stitching back together” above.)
- STEP 1 – Trace the inside of your hoop on a piece of cardstock.
- STEP 2 – Write a note, sign your name, add a date or leave it blank.
- STEP 3 – Cute out your circle of paper and place it on the back side of your hoop. Be sure to check that any text is going the right direction. Then, make a 2-3″ a bead of hot glue along the inside of your hoop.
- STEP 4 – Fold fabric down over the glue line and press it in tight. Continue around the entire hoop.
3 – How to finish an embroidery hoop with a second piece of fabric.
I like to think of this way of finishing as the “classy” way. It make take a little more effort, but the end result will have you looking like an embroidery rockstar. I love how this method give you stitching on the front and the back. Just like with the note on paper, you can put any message, signature, or fabric pattern on the back of your hoop. The possibilities are endless!
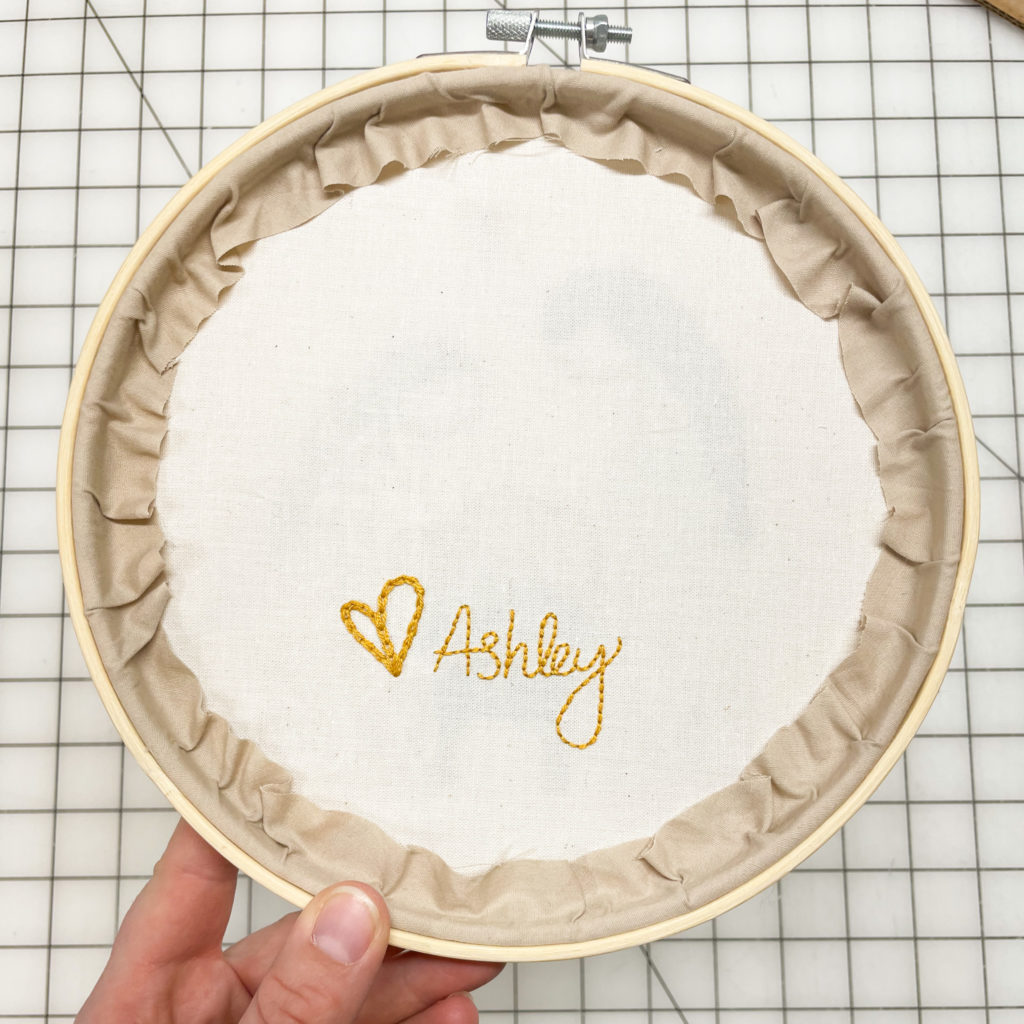
PROS:
- Gives a classy finish
- Fully customizable
- Covers the stitching on the back of the hoop (if that bothers you.)
CONS:
- You can’t adjust the embroidery once you are done.
- You need extra supplies.
- Take extra time to stitch back before finishing.
Step by Step instructions for finishing with extra fabric.
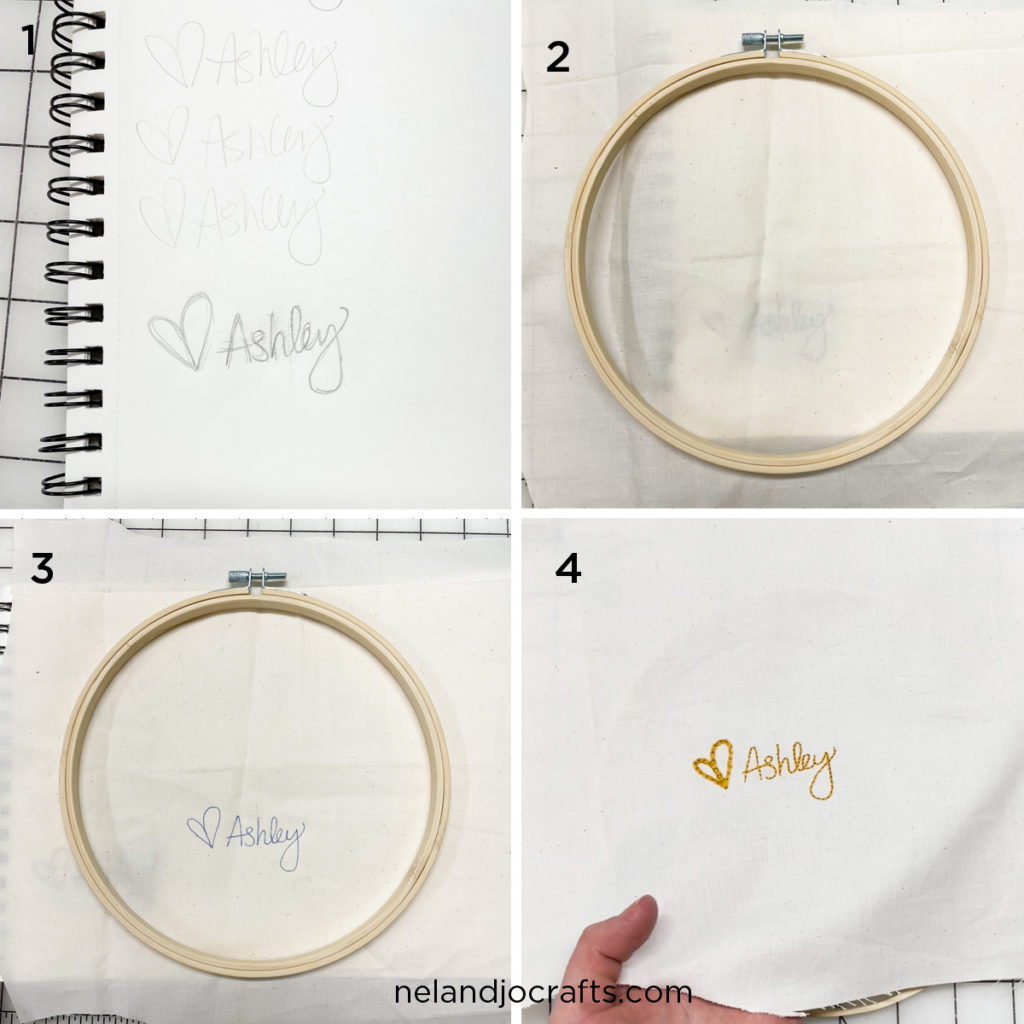
Prepping and stitching the back:
- STEP 1 – Decide what you want the back of your hoop to say and write it down. This could be something like a signature or date and initials. The step 1 image is how I sign cards to friends and family. Alternately, you could choose to type a message on a computer and print it out.
- STEP 2 – Check to make sure your sizing is correct. Your fabric should be larger than your hoop and your text should fit inside the hoop.
- STEP 3 – Transfer your design to your fabric. Then check to make sure it lines up where you want it in the hoop. NOTE: your front fabric will cover about a 1/2 inch on the inside of you hoop. (see step finished image by pros and cons above.)
- STEP 4 – Stitch your design. Take your fabric out of the hoop and iron any major wrinkles.
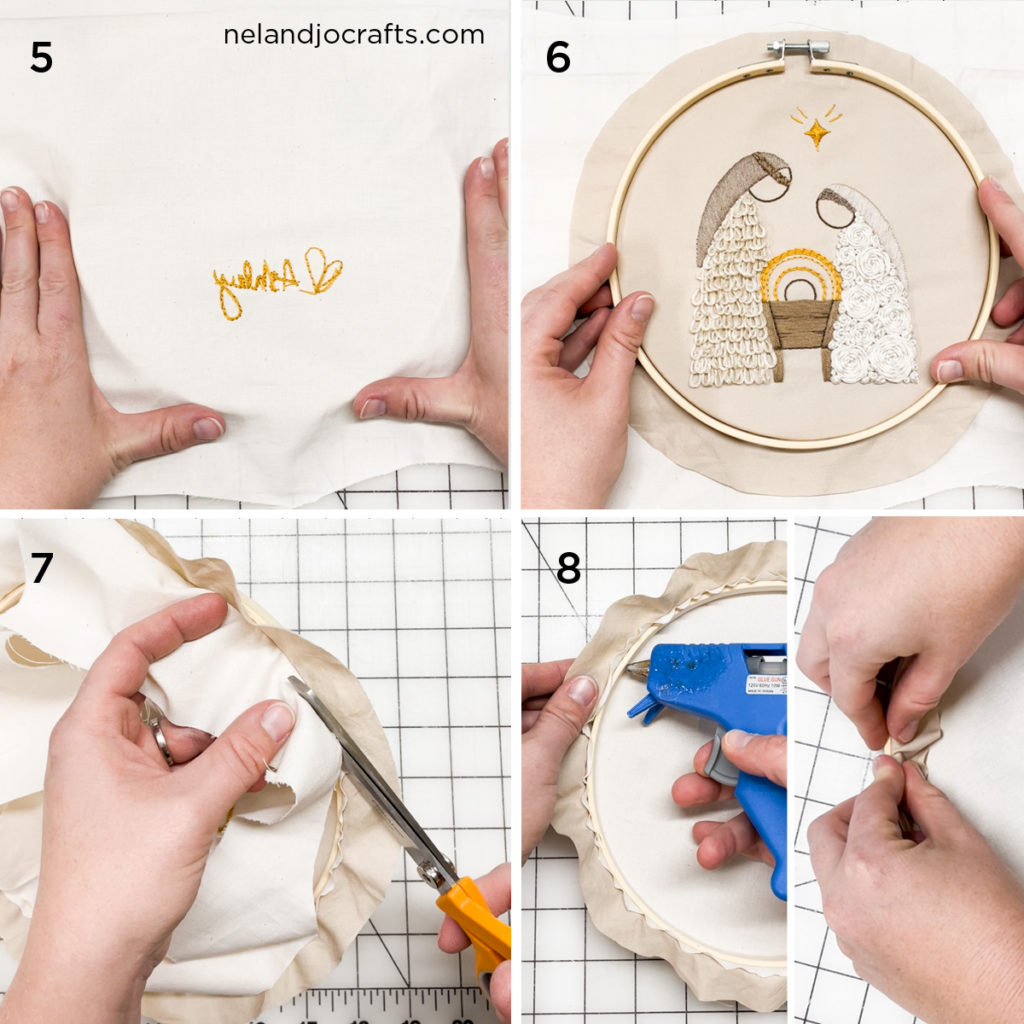
Finishing the back
- STEP 5 – Flip your back piece of fabric over so you are seeing the wrong side of the fabric and embroidery. Lay it on top of the inner hoop and center the fabric.
- STEP 6 – Place your finished embroidery right side up on top of your backing fabric. Try to place it as centered as possible. Place your outer hoop on top and push down. Tighten both fabrics and check the alignment. Don’t forget to check the back too. Adjust as needed. This is your last chance to change alignment. Then make sure your hoop is tightened all the way.
- STEP 7 – Trim the BACKING fabric about 1/8′ away from the inner hoop. Then trim your top embroidery fabric to about 1″ away from the hoop.
- STEP 8 – Working in 2-3″ sections, make a bead of glue along the inside of the hoop and then fold over and press the fabric into the glue.
Time to display your work!
Good job! You finished your hoop. I like to use a section of twine or ribbon to make a loop through the screw gate to hang your hoop from.
If you don’t have a glue gun, you can pick one up at your local craft store or Walmart for around $5. You can also order this one on Amazon and have it come right to your door.
Happy stitching!
These are great options! I’m going to try for the 3rd one! 😀🤞