How To Do Blanket Stitch
January 18, 2022
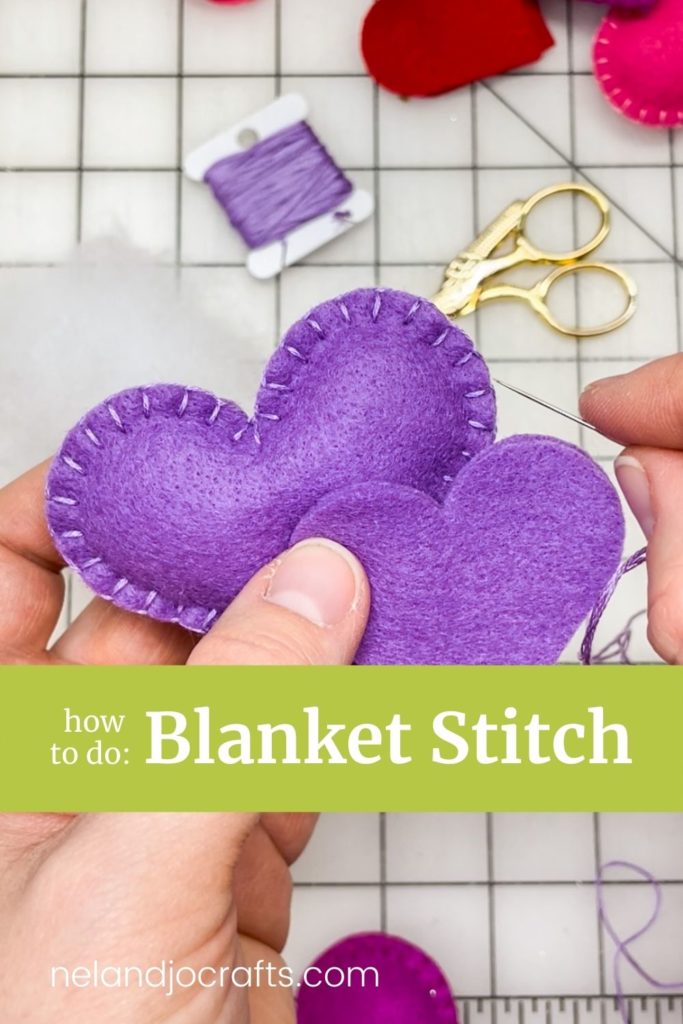
Blanket stitch is typically thought of as a border stitch. It’s common uses are for stitching around the edge of a single piece of fabric as a decoration or to sew two pieces of fabric together. It can also be used as a stitch in embroidery on the surface of the fabric. This post will cover how to do blanket stitch around the edge of two pieces of felt to sew them together.

Before you stitch
Before we start learning how to do the blanket stitch, we need to do a little prep work. First, you need to cute your felt shapes and make sure that the edges match. Making an even blanket stitch on uneven edges is difficult. Check out THIS POST to learn how to easily cut felt. Next, perp your needle with 3 strands of embroidery floss. I like to work with 28-34″ of floss at a time, about the length of your arm give or take.
Blanket stitch steps

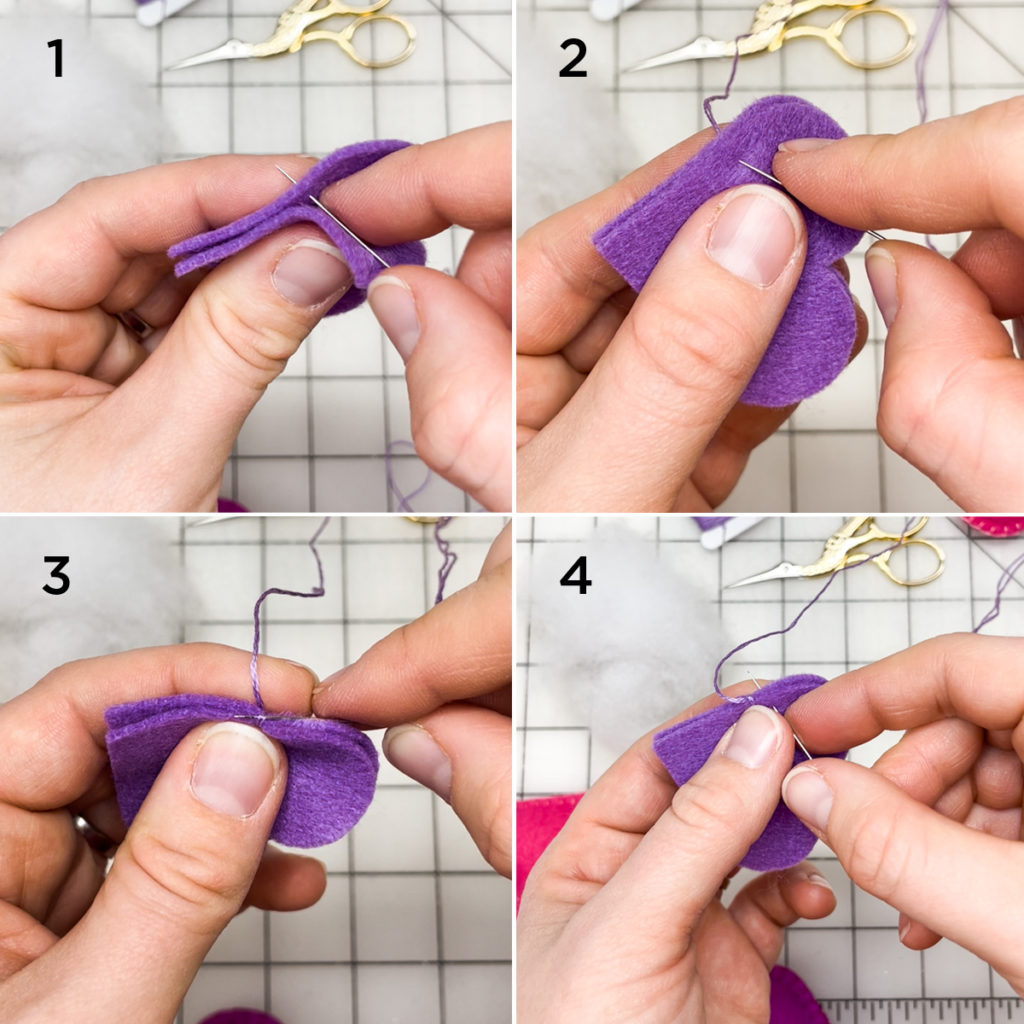
- STEP 1 – Alight your shapes so the edges all match, and tie a knot in the end of your thread. Go through the back piece of felt about 1/8″ down from the edge. Pull thread through.
- STEP 2 – Lay the top piece of felt back over the thread knot. Push needle through both pieces of fabric so that it comes out where your thread is coming out of the back. Essentially making a loop over the edge of the fabric.
- STEP 3 – Slide your needle, from right to left, under the floss loop you just made, right at the edge of the fabric.
- STEP 4 – Go through both pieces of fabric, 1/8″ to the right, and 1/8″ down from the felt edge. (If you first stitch was shorter or longer match that length instead.)

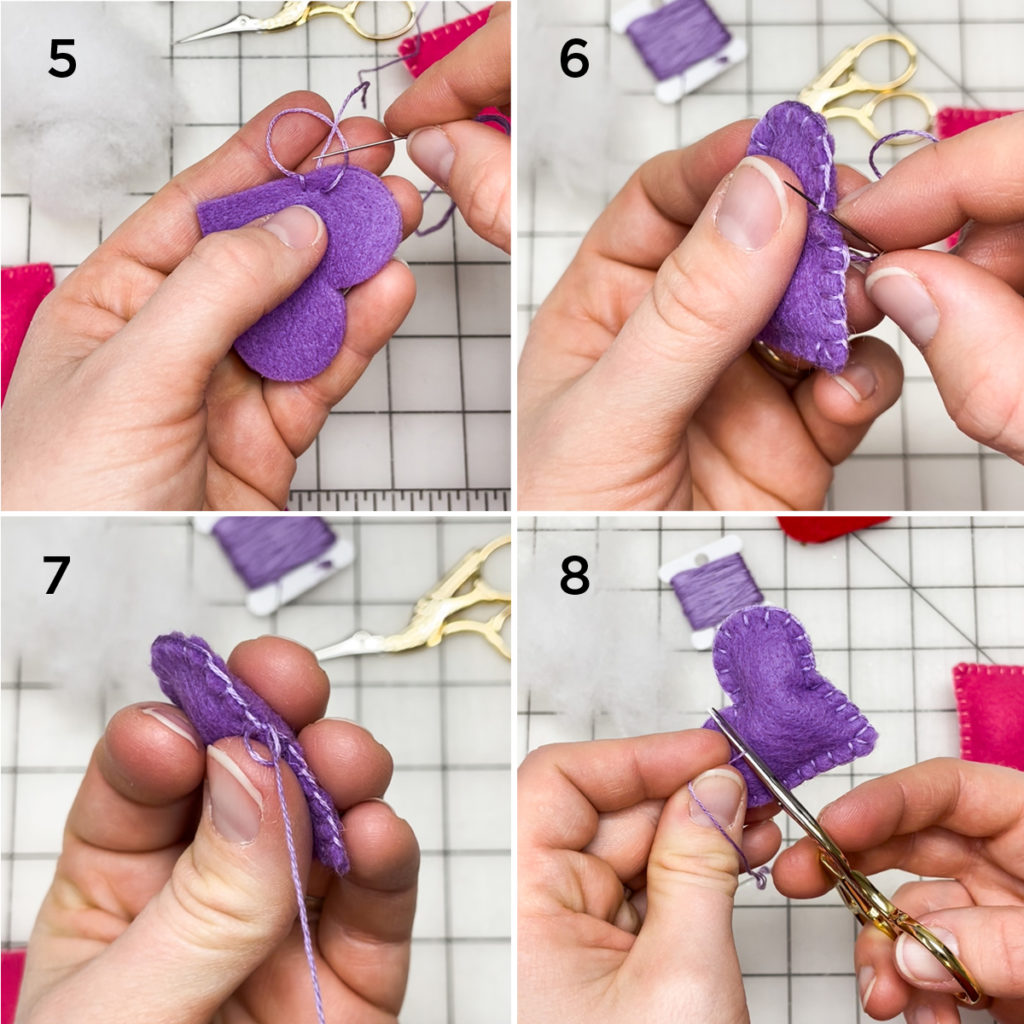
- STEP 5 – Pull your needle through the felt, and through the loop created by your thread. Pull thread until it’s snug to the edge of the felt. Repeat steps 4 & 5 around the shape.
- STEP 6 – To finish, slide your needle under your first stitch at the end of the felt and pull thread sung.
- STEP 7 – Slide your needle under the same spot, this time pulling your needle through the loop created to tie a knot.
- STEP 8 – Hide thread end in your shape by pushing your needle in at the edge of the shape and out in the middle of the shape. Cut thread as close to the fabric as possible.
Tip for stuffing your shape
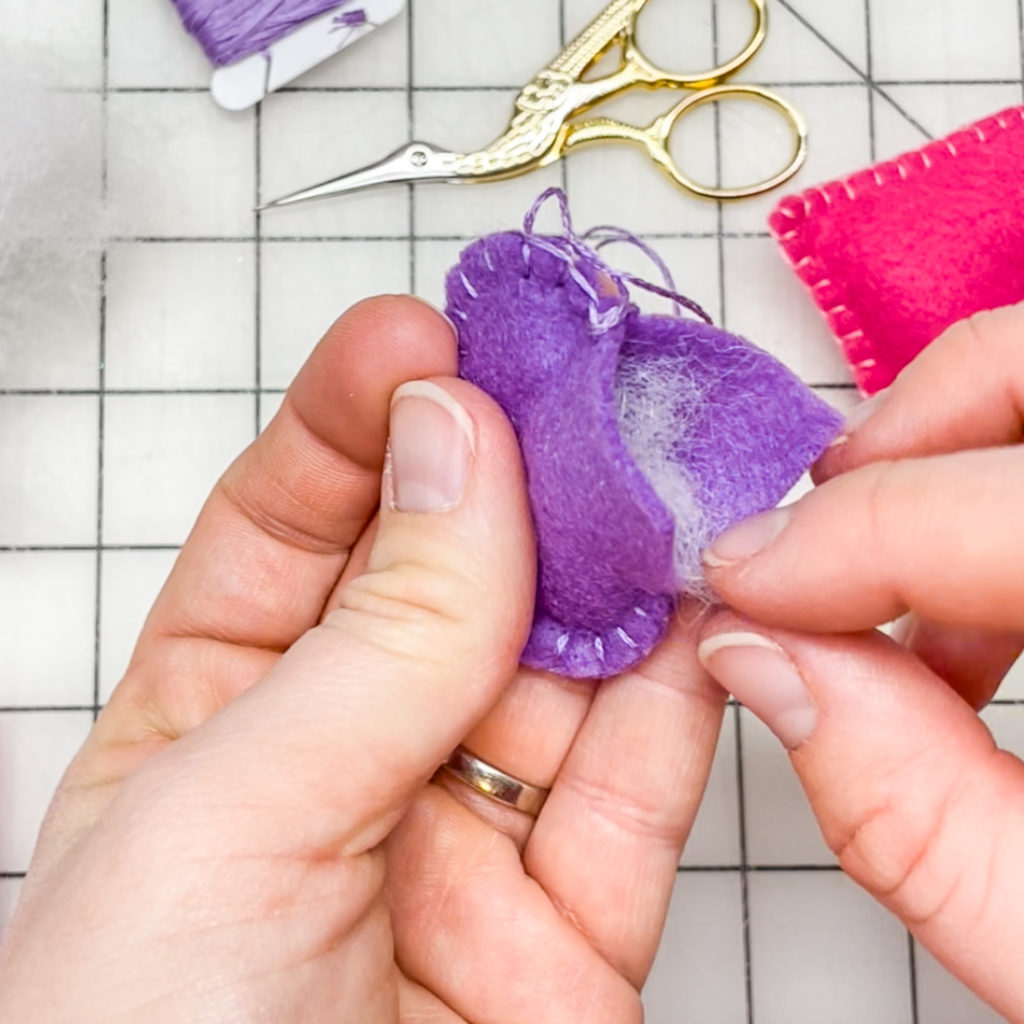
When stuffing small shapes with Poly-fil, its best to stuff as you go. I can be incredibly difficult to get the stuffing into all the nooks and corners from one small hole. This is why I recommend stuffing as you go.

In the example I stitched a heart. I stitched the top half of the heart first. Then stopped and added stuffing to the top half of the heart. Next, I stitched down the side just past the tip of the heart leaving a small hole to finish stuffing. Then I stitched the heart closed. Depending on the shape you choose to work with, you might have to stop several times to add stuffing before moving on. For example, when I stitched the letter “O,” I started by stitching the middle of the circle together. Then I stitched 2 or 3 inches together along the outside and added stuffing. I would go other couple inches and stuff again. Take a min and plan out how you want to stuff your shape before you have stitched yourself into a corner and need to unpick stitches to get the stuffing in.
Video for how to do blanket stitch
Check out the video version of how to do blanket stitch where I walk you through each step in real time.