How To Make A Wrapped Puff Flower
April 5, 2022
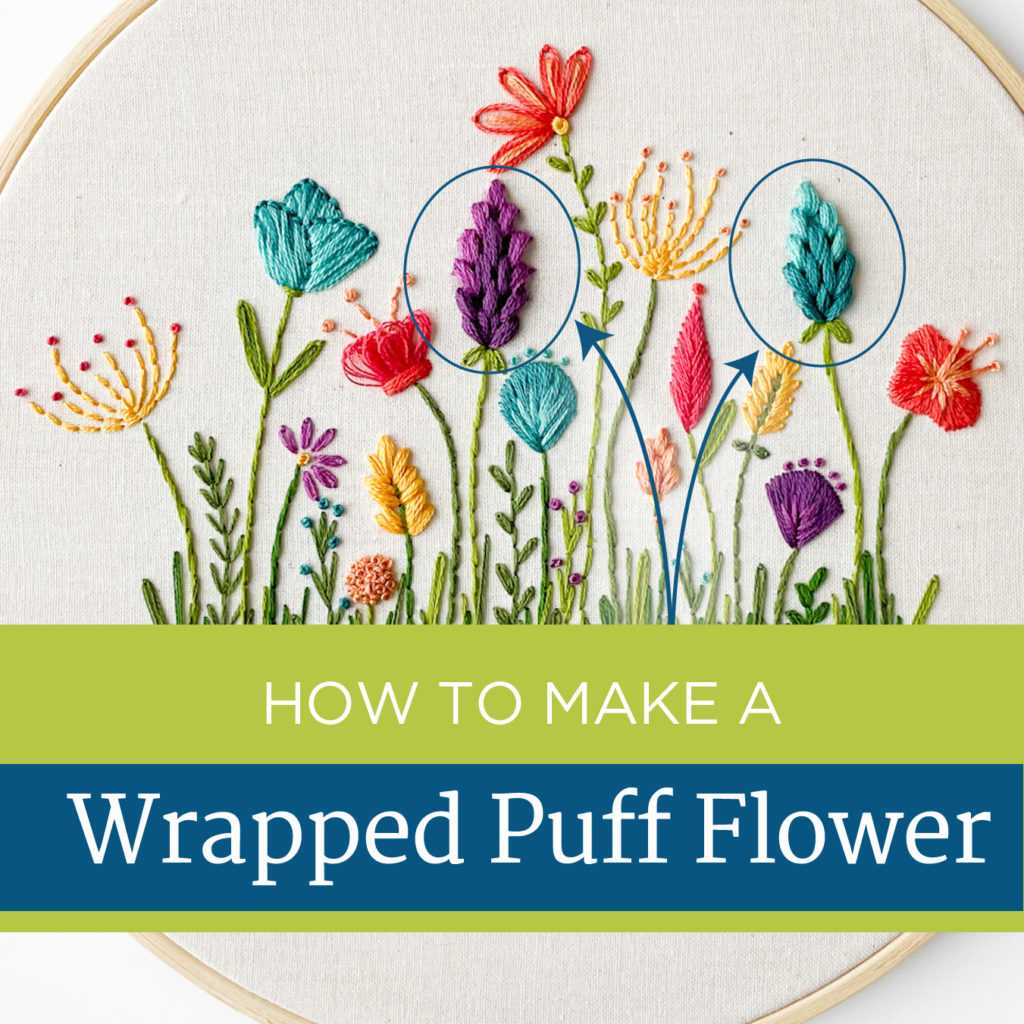
In my one of my newest patterns called “Whimsical Flowers” I added some new types of flowers. Among them is the wrapped puff flower. It’s a fun flower to make but can be a bit confusing to understand. To help you avoid mistakes, I have created full written step by step instructions and a tutorial video. You will find both in this post.

Making a Wrapped Puff Flower
This flower is made by wrapping your thread around horizontal foundation stitches. Each petal is made up of three wraps or stitches. Each of the first 4 rows adds 1 petal each. The last row or two decrease the number of petals. It is best to make a wrapped puff flower with 6 strands of floss on your needle. This will give your finished flower a nice full look.
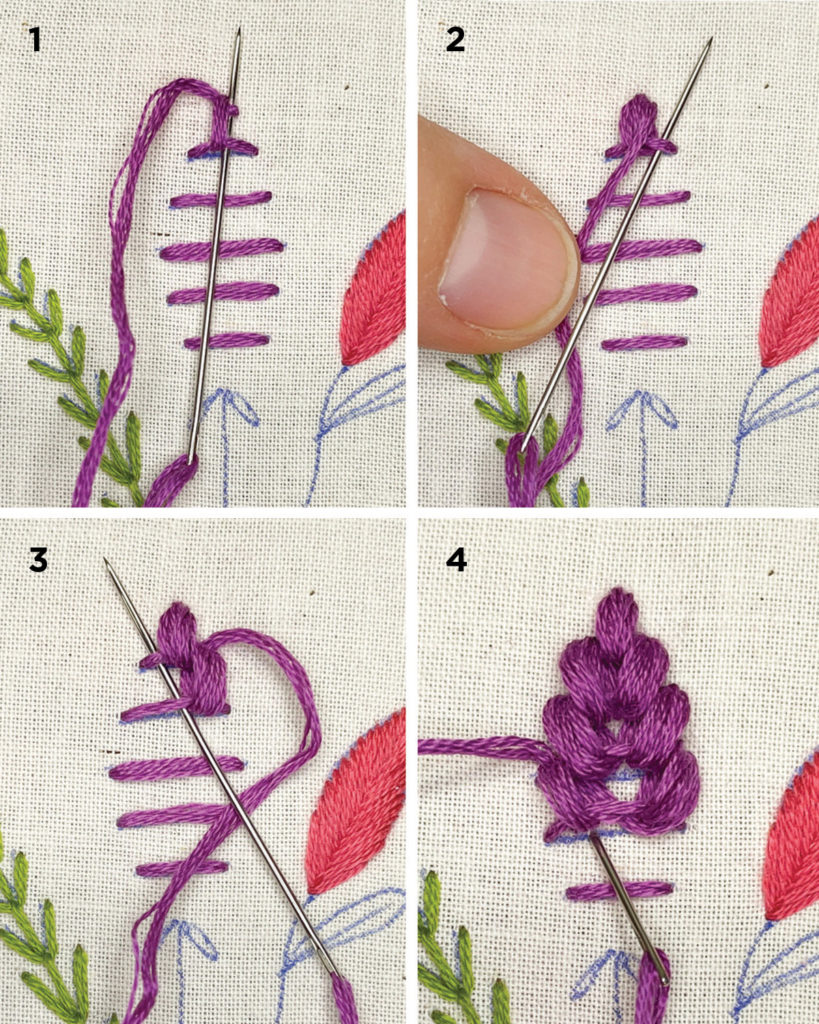
Steps 1 – 4

- 1) Begin by making one straight stitch over each guide line in the pattern using the lighter color of floss. I will refer to the lines by number. The top line is, line 1. Next, come up at the tip of the flower above line 1. Next, slide your needle under lines 2 and 1, coming out to the side of your floss end. Gently pull your floss through. This is wrap 1. For wrap 2, again slide your needle under lines 2 and 1, coming out on the other side of your flower point. Gently pull your floss through.
- 2) For Wrap 3, slid you needle under line 2, coming out to the side of your first petal. Pull your floss through.
- 3) Now, make two new wraps going under lines 3 and 2. Make wrap 3 by going under lines 3 and 2, coming out to the opposite side of your first petal. Then, make 2 new wraps on this side. Next, go under line 3 and out to the side like we did in picture 2.
- 4) Make a new petal on each side of the next two rows. When you finish with your last petal, go down into the fabric and tie off your floss.
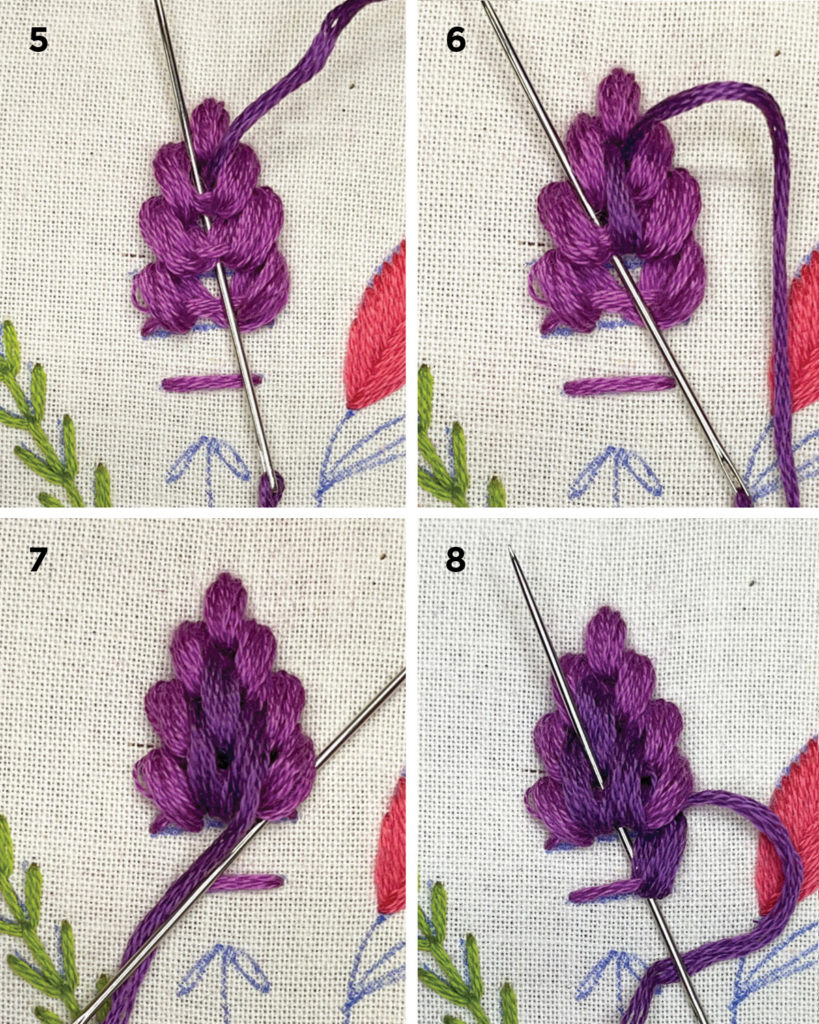
Steps 5 – 8

- 5) Come up between lines 2 and 3 with the darker color of floss. Then, make 2 wraps going under lines 4 and 3, coming out on either side of your floss end.
- 6) Make wrap 3 by going under line 4, coming up between the left and middle petal on that row.
- 7) Now make one petal on either side of your darker petal by going under lines 5 and 4. Make your final wrap by going under line 5 and coming out to the far side.
- 8) Make two wraps under lines 6 and 5, coming out to the far side. Make wrap 3 by going under lines 6 and 5, coming up in the middle of the petals on the previous row. Finish your petal in the middle, and then make a new petal to the far side. Still going under lines 6 and 5. This will decrease your number of petals from 4 to 3.
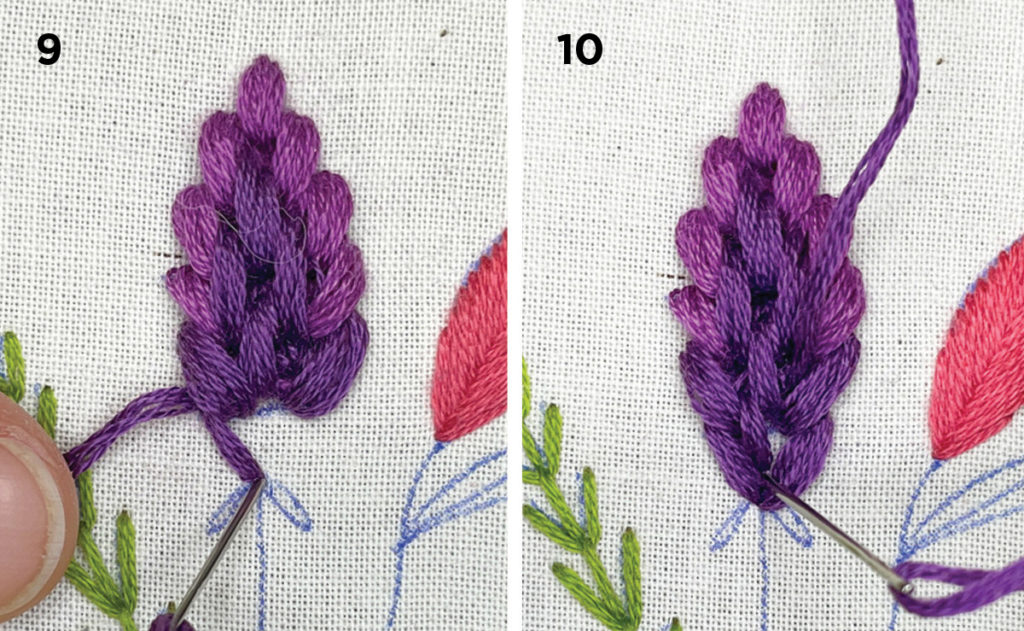
Steps 9 & 10

- 9) Your last row of petals will finish into the fabric instead of wrapping around another line. Come out to the side by going under line 6. Then, go down down into the fabric right above the stem. Next, come up through the fabric right above line 6, to the same side of the petals. Then, go down into the same point above the stem.
- 10) Make a petal on the opposite side by repeating this process. Next, finish your flower by filling in the small gap between your last two petals. Come up between one of the two petals on the row above. Then, go down into the stitches right at the stem. Repeat this process by coming up between the other petals and down at the stem.
Wrapped Puff Tutorial Video
Watch me stitch in real time as I make a wrapped puff flower. I’ll walk you through step by step, showing you exactly where to put your needle next.
Questions?
If you struggle following these directions or have any other questions about embroidery, I would love to hear from you. Yon can leave a comment here on this post or you can email me here.