How to make chain stitch and whipped backstitch.
November 10, 2021
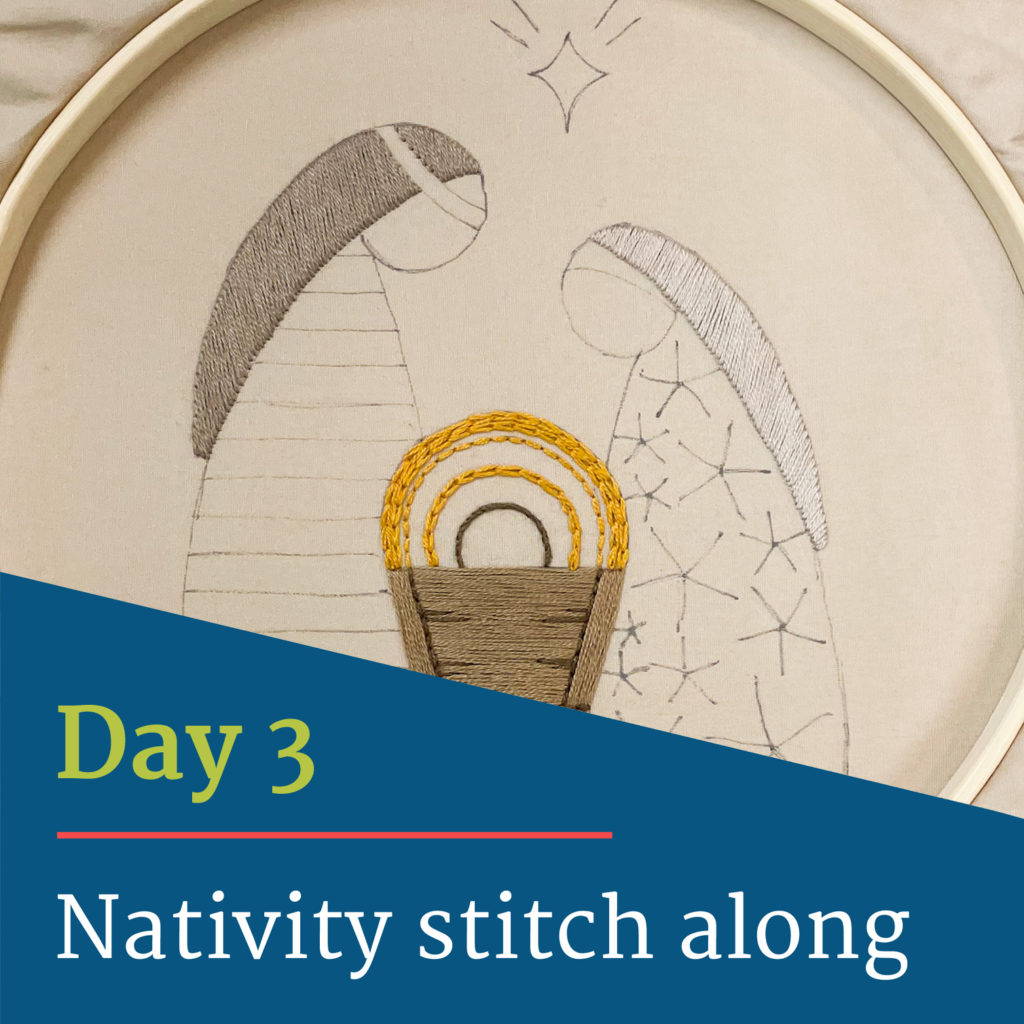
Nativity stitch along day 3.
Welcome to Day 3! Today we are going to cover two more stitches, chain stitch and whipped backstitch. We are also going to cover making satin stitch in a different shape than on day 1. Lets get stitching!

How to make chain stitch.
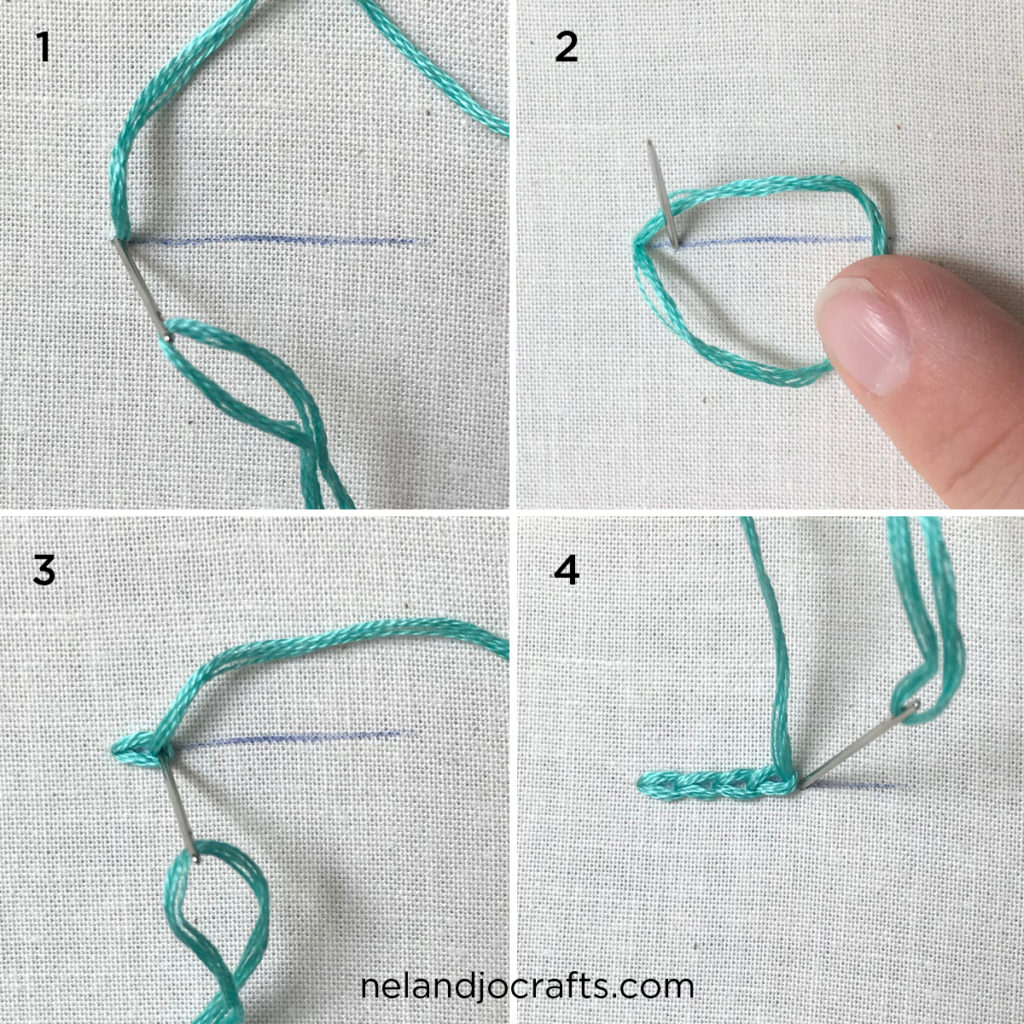
Chain stitch is one of my very favorite stitches. If you stick around here you are definitely going to see come up agin and again. Something about the interlocking stitches just makes it extra special. Chain stitch is great for straight lines, curved lines, lettering, overlapping, and filling a space (see why I love it?).

- STEP 1 – Insert your needle at the beginning of your line and pull up thread. Reinsert your needle at your starting point.
- STEP 2 – Pull down thread leaving a loop on top of your fabric. Insert your needle one stitch length away from your first point.
- STEP 3 – Pull your thread through creating your first chain. Reinsert your needle at your last up point, like step 1. Repeat step 2.
- STEP 4 – To finish, pull up thread and create your last chain. Reinsert your needle on the OUTSIDE of your last chain to anchor it in place.
PRO TIP: When pulling your thread through the chain, be sure to pull in the direction you are stitching. If you pull back toward the start of the line your chain loop will not lay flat.
How to make whipped backstitch.
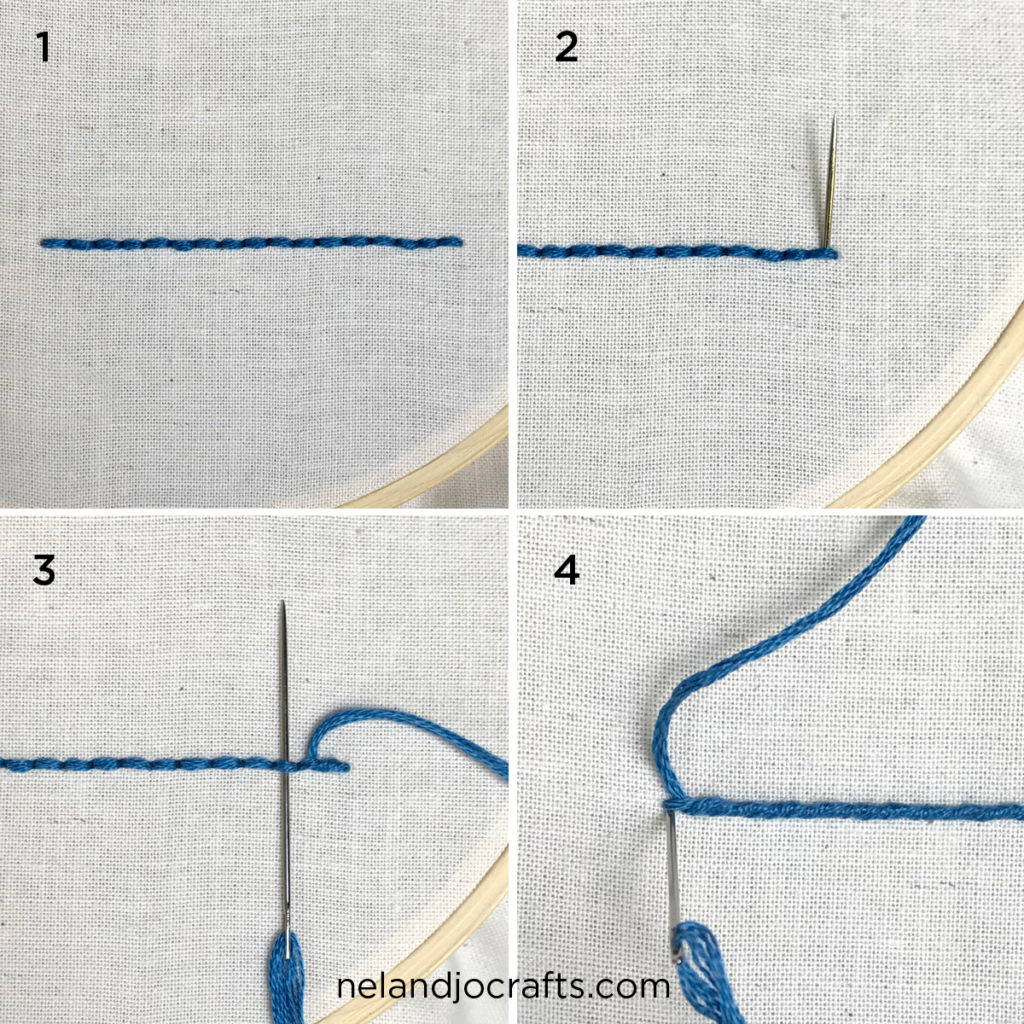
On the Nativity hoop, whipped backstitch is used to define the head of Jesus, Mary, and Joseph. Whipped backstitch makes a nice raised line that almost looks like rope. I love the contrasting texture it brings to the hoop.

- STEP 1 – Begin with a completed line of backstitch. (See instructions for backstitch here.)
- STEP 2 – Come up UNDER the last stitch and pull up thread.
- STEP 3 – Slide your needle under the next stitch and pull through. Be sure to keep a consistent direction. (In this example, the needle direction is going from bottom to top.)
- STEP 4 – Slide you needle under each stitch until you get to the end of your line. Finish by inserting you needle under the last stitch and pulling the thread down.
PRO TIP: If you find that you needle is catching on the thread or fabric as you slide it under, try using the eye of your needle instead of the tip. The eye is blunt and wont catch the stitches.
Video for day 3 of stitch along.
Note that if you view the video on youtube or on a mobile device the video will be larger and easier to see.
Questions?
I hope you are loving stitching along with me. I’m having a blast sharing tips and tricks with you while I stitch. If you missed day 1 you can find it HERE. If you missed day 2 you can find it HERE. Also, if you are looking for a step by step guide to stitching, like the images found in this blog. You can get my Stitch Library and Beginner’s Guide to Hand Embroidery in my shop. The library contains 14 common stitches, and the beginner’s guide covers everything you need to know to get started, set up your hoop, and finish your hoop. Get your copy here.
As always, if you have questions about today’s stitch or anything else embroidery, leave them here in the comments or email ashley@nelandjocrafts.com. Happy stitching.